Hyundai Elantra (CN7): Interior Trim / Rear Wheel House Trim
Components and components location
| Component Location |

| 1. Rear wheel house trim |
Repair procedures
| Replacement |
|

|

| 1. | Remove the rear seat cushion assembly. (Refer to Rear Seat - "Rear Seat Assembly") |
| 2. | Using screwdriver or remover, remove the rear door scuff trim (A).
|
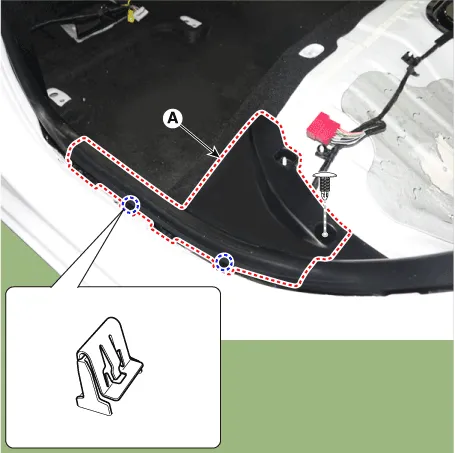
| 3. | Using screwdriver or remover, remove the rear pillar trim (A).
|
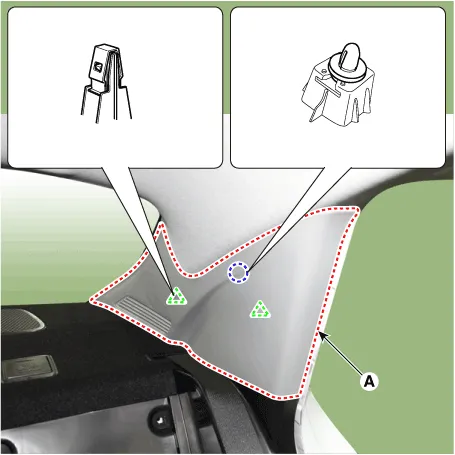
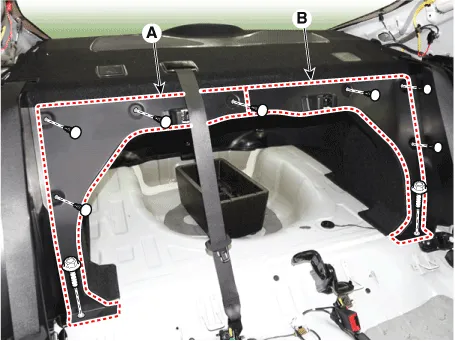
| 4. | Loosen mounting clips and bolts, remove the luggage partition side trim (A) and (B).
|
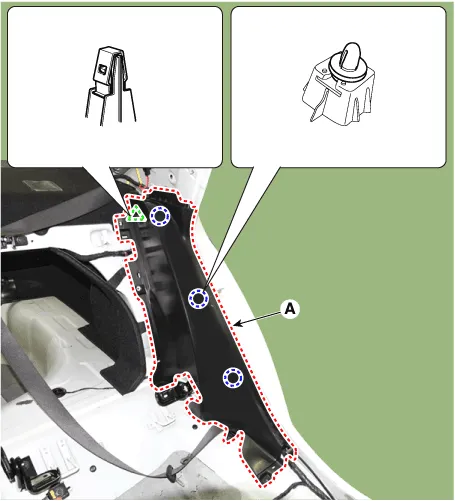
| 5. | After loosening the mounting bolts, remove the rear wheel house trim (A).
|
| 6. | To install, reverse the removal procedure.
|
Components and components location Component Location 1. Rear pillar trim Repair procedures Replacement • When removing with a flat - tip screwdriver or remover, wrap protective tape around the tools to prevent damage to components.
Components and components location Component Location 1. Rear package tray trim Repair procedures Replacement • When removing with a flat - tip screwdriver or remover, wrap protective tape around the tools to prevent damage to components.
Other information:
Hyundai Elantra (CN7) 2021-2026 Service Manual: Description and operation
D
Hyundai Elantra (CN7) 2021-2026 Service Manual: Description and operation
DescriptionRear Corner Radar is a system that measures the relative speed and distance from the following vehicles by using two electromagnetic wave radar sensors attached to the rear bumper, and detects any vehicle within the blind spot zone and gives off alarm.
Categories
- Manuals Home
- Hyundai Elantra Owners Manual
- Hyundai Elantra Service Manual
- Body Electrical System
- Specifications
- Front Bumper
- New on site
- Most important about car
