Hyundai Elantra: Engine And Transaxle Assembly / Engine Mounting
Components and components location
| Components |
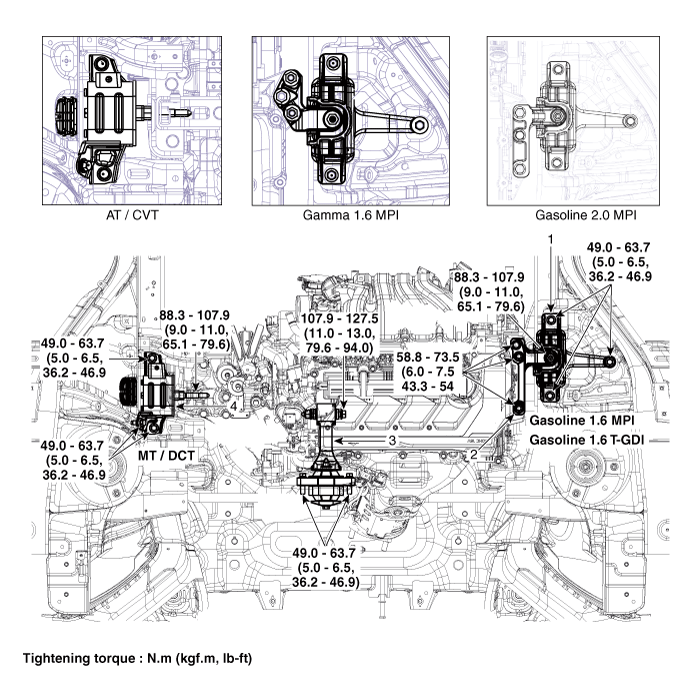
| 1. Engine mounting bracket 2. Engine mounting support bracket | 3. Roll road braket 4. Transaxle mounting bracket |
Repair procedures
| Removal and Installation |
Engine mounting bracket
| 1. | Remove the engine room under cover. (Refer to Engine and Transaxle Assembly - "Engine Room Under Cover") |
| 2. | Install the jack to the edge of oil pan.
|

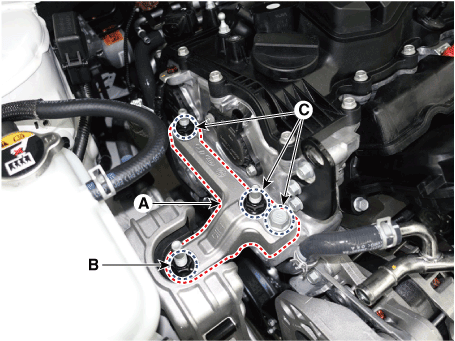
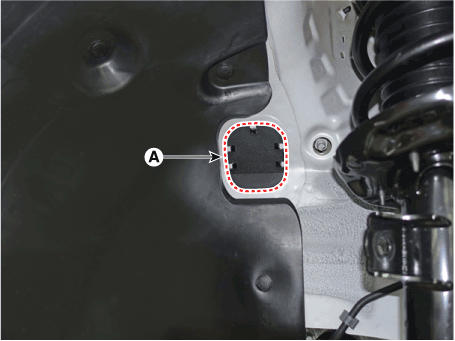
| 3. | Remove the engine mounting support bracket (A).
|
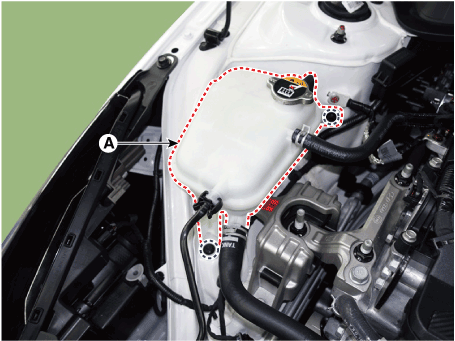
| 4. | Loosen the coolant reservoir tank (A) mounting bolts to obtain engine mounting working space.
|
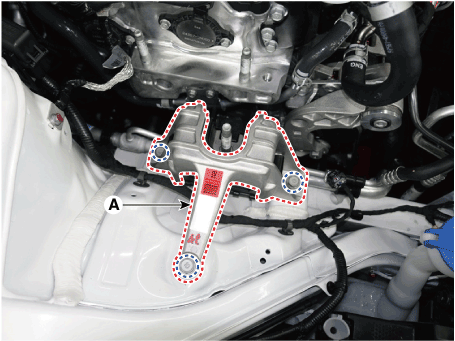
| 5. | Remove the engine mounting bracket (A).
|
| 6. | Installation is in the reverse order of removal. |
Transaxle mounting bracket
| 1. | Disconnect the negative battery terminal. |
| 2. | Remove the engine room under cover. (Refer to Engine and Transaxle Assembly - "Engine Room Under Cover") |
| 3. | Remove the air duct and air cleaner assembly. (Refer to Intake and Exhaust System - "Air Cleaner") |
| 4. | Remove the battery and battery tray. (Refer to Engine Electrical System - "Battery") |
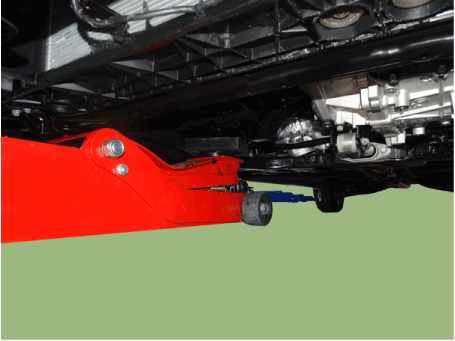
| 5. | Place the jack under the transaxle.
|

| 6. | Remove the service cover (A).
|
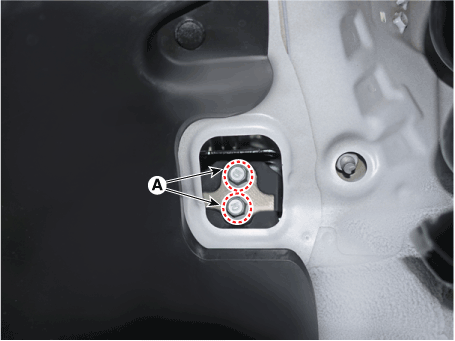
| 7. | Loosen the transaxle support bracket mounting bolts (A).
|
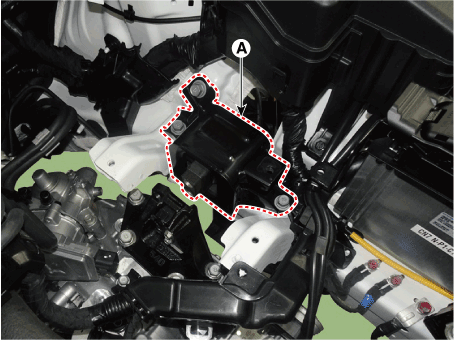
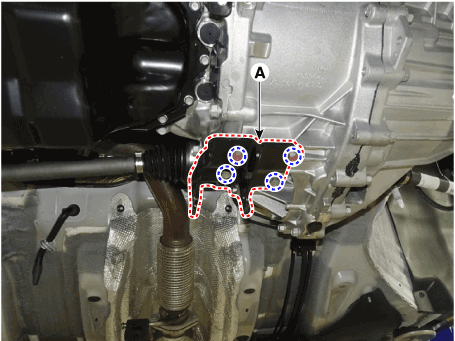
| 8. | Remove the transaxle mounting bracket (A).
|
| 9. | Installation is in the reverse order of removal. |
Roll rod bracket
| 1. | Remove the roll rod bracket (A).
|

| 2. | Remove the roll rod support bracket (A).
|
| 3. | Installation is in the reverse order of removal. |
 Engine Room Under Cover
Repair procedures
Removal and Installation1.Remove the engine room under cover (A). Tightening torque : 7.8 - 11.8 N.m (0.8 - 1.2 kgf...
 Engine And Transaxle Assembly
Repair procedures
Removal
•
Use fender covers to avoid damaging painted surfaces.•
To avoid damage, unplug the wiring connectors carefully while holding the connector portion...
Other information:
Hyundai Elantra (CN7) 2021-2025 Owner's Manual: Checking the Engine Coolant Level
Check the condition and connections of all cooling system hoses and heater hoses. Replace any swollen or deteriorated hoses. The coolant level should be filled between the F and the L marks on the side of the coolant reservoir when the engine is cool...
Hyundai Elantra (CN7) 2021-2025 Owner's Manual: How to deactivate the Smart Trunk release function using the smart key
1. Door lock 2. Door unlock 3. Trunk open 4. Panic 5. Remote Start If you press any button of the smart key during the Detect and Alert stage, the Smart Trunk release function will be deactivated. Make sure to be aware of how to deactivate the Smart Trunk release function for emergency situations...
Categories
- Manuals Home
- 7th Gen Hyundai Elantra Owners Manual
- 7nd Gen Hyundai Elantra Service Manual
- Interior Overview
- System operation
- Vehicle Information
- Engine Mechanical System
- Instrument Panel Overview
Tilting the sunroof
.png)
Tilt the sunroof open:
Push the sunroof control lever upward until the sunroof moves to the desired position.
To close the sunroof:
Press the sunroof lever forward until the sunroof moves to the desired position.

Copyright © 2025 www.helantra7.com