Hyundai Elantra: AVN System / Speaker
Repair procedures
| Inspection |
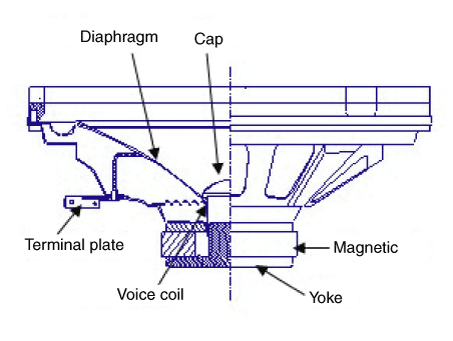
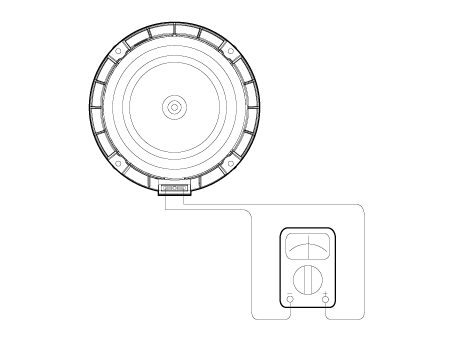
| 1. | Troubleshooting for Speaker
|


| Removal |
[Front Door Speakers]
| 1. | Disconnect the negative (-) battery terminal. |
| 2. | Remove the front door trim. (Refer to Body - "Front Door Trim") |
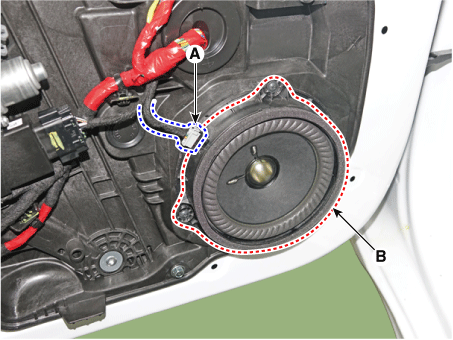
| 3. | Remove the front door speaker (B) after disconnecting the connector (A) and loosening screws.
|
[Front Door Tweeter Speaker]
| 1. | Disconnect the negative (-) battery terminal. |
| 2. | Remove the front door trim. (Refer to Body - "Front Door Trim") |
| 3. | Remove the tweeter speaker (A) after loosening screws.
|
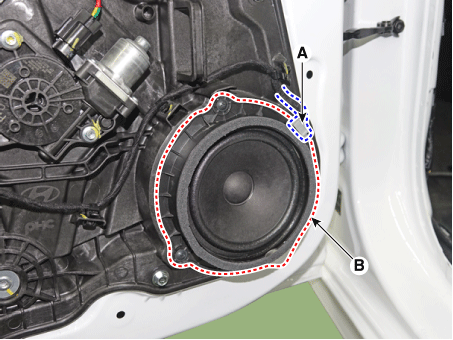
[Rear Door Speakers ]
| 1. | Disconnect the negative (-) battery terminal. |
| 2. | Remove the Rear door trim. (Refer to Body - "Rear Door Trim") |
| 3. | Remove the rear door speaker (B) after disconnecting the connector (A) and loosening screws.
|
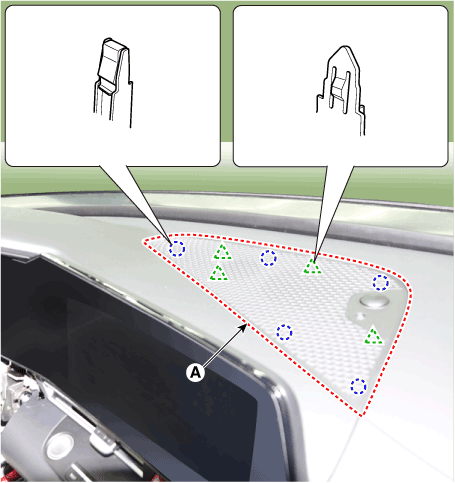
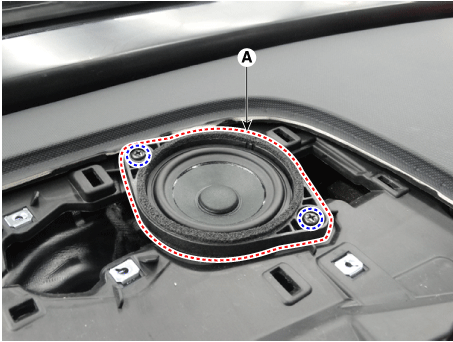
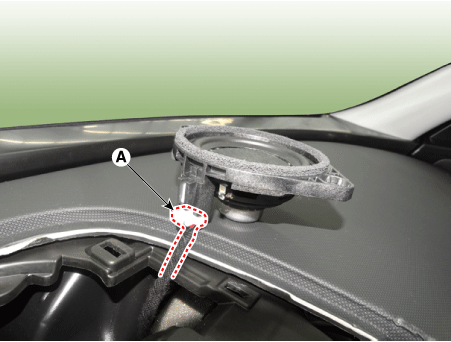
[Crash Pad Center Speaker]
|
| 1. | Using a screwdriver or remover, remove the crash pad center speaker grille (A).
|
| 2. | Remove the center speaker (A) after loosening screws.
|
| 3. | Disconnect the speaker connector (A).
|
[Sub Woofer Speaker]
| 1. | Remove the rear seat. (Refer to Body - "Rear Seat") |
| 2. | Remove the package tray trim. (Refer to Body - "Rear Package Tray Trim") |
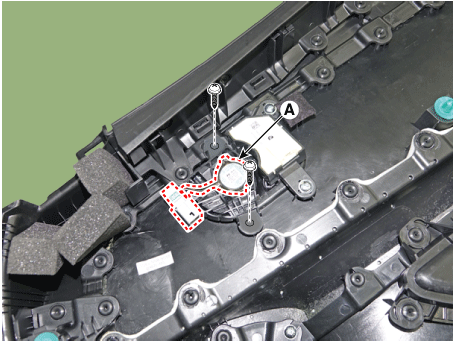
| 3. | Remove the sub woofer speaker (A) after disconnect the connector(B) and loosening the bolts.
|
| Installation |
Front Door Speaker
| 1. | Install the front door speaker. |
| 2. | Install the front door trim. |
Rear Door Speaker
| 1. | Install the rear door speaker. |
| 2. | Install the rear door trim. |
Crash Pad Center Speaker
| 1. | Install the center speaker. |
| 2. | Install the center speaker grille. |
Subwoofer Speaker
| 1. | Install the subwoofer speaker. |
| 2. | Install the rear package tray and rear seat. |
|
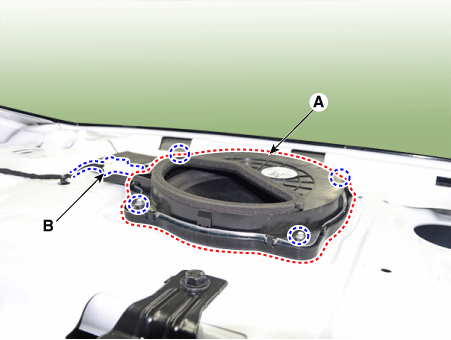
 AVN Antenna
Components and components location
Components
Repair procedures
RemovalRoof Antenna1.Disconnect the negative (-) battery terminal.2.Remove the roof trim...
 USB Jack
Description and operation
DescriptionThe multimedia jack on the console upper cover is for customers who like to listen to external portable music players like the MP3 etc...
Other information:
Hyundai Elantra (CN7) 2021-2025 Service Manual: Special service tools
Special Service Tools Tool (Number and Name) Illustration Use 09495-3K000Band installerInstallation of ear type boot band09495-39100Band installerInstallation of hook type boot band09568-1S100Ball joint pullerRemove the ball joint front axle 09495-33000PullerRemove the spider assembly from the drive shaft..
Hyundai Elantra (CN7) 2021-2025 Service Manual: Battery Sensor
Description and operation DescriptionVehicles have many control units that use more electricity. These units control their own system based on information from diverse sensors. It is important to have a stable power supply as there diverse sensors giving a variety of information. Battery sensor is mounted on battery (-) terminal. It transmits battery voltage, current, temperature information ..
Categories
- Manuals Home
- 7th Gen Hyundai Elantra Owners Manual
- 7nd Gen Hyundai Elantra Service Manual
- Forward Collision–Avoidance Assist (FCA) (sensor fusion)
- Engine Oil
- System disabled
- Vehicle Information
- Interior Overview
Function malfunction and limitations
Function malfunction
.png)
When High Beam Assist is not working properly, the ‘Check High Beam Assist (HBA) system’ or ‘Check HBA (High Beam Assist) system’ warning message will appear and warning light will illuminate on the cluster. Take your vehicle to an authorized HYUNDAI dealer and have the function checked.

Copyright © 2025 www.helantra7.com