Hyundai Elantra: Trunk Lid / Trunk Lid Latch
Hyundai Elantra (CN7) 2021-2025 Service Manual / Body (Interior and Exterior) / Trunk Lid / Trunk Lid Latch
Repair procedures
| Replacement |
[Trunk lid latch]
|
|
| 1. | Remove the tail trunk lid trim. (Refer to Trunk Lid - "Trunk Lid Trim") |
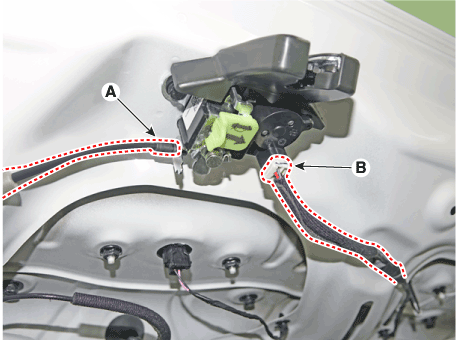
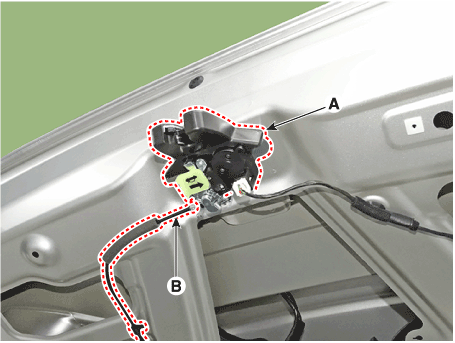
| 2. | Disconnect the connector (A) and cable (B).
|
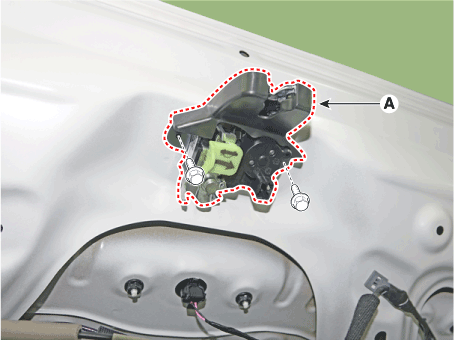
| 3. | Loosen the mounting bolts and remove the trunk lid latch (A).
|
| 4. | To install, reverse the removal procedure.
|
| [Trunk lid cable] |
| 1. | Remove the front seat assembly. (Refer to Front Seat - "Front Seat Assembly") |
| 2. | Remove the rear seat assembly. (Refer to rear Seat - "Rear Seat Assembly") |
| 3. | Remove the floor console assembly. (Refer to Floor Console - "Floor Console Assembly") |
| 4. | Remove the center pillar lower trim. (Refer to Interior Trim - "Center Pillar Trim") |
| 5. | Remove the cowl side trim. (Refer to Interior Trim - "Cowl Side Trim") |
| 6. | Remove the luggage side trim. (Refer to Interior Trim - "Cowl Side Trim") |
| 7. | Remove the floor carpet. (Refer to "Floor carpet") |
| 8. | Remove the tail trunk lid trim. (Refer to Trunk Lid - "Trunk Lid Trim") |
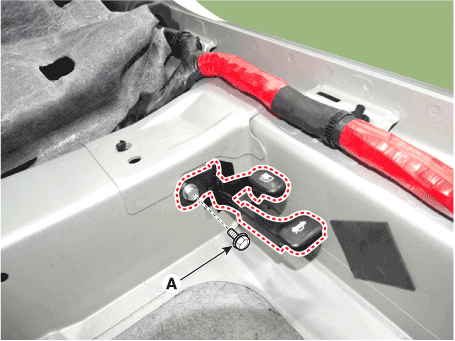
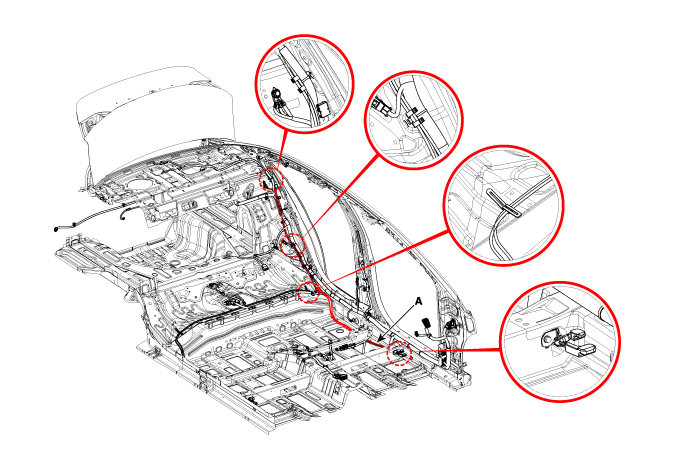
| 9. | Loosen the trunk lid catch mounting bolt (A).
|
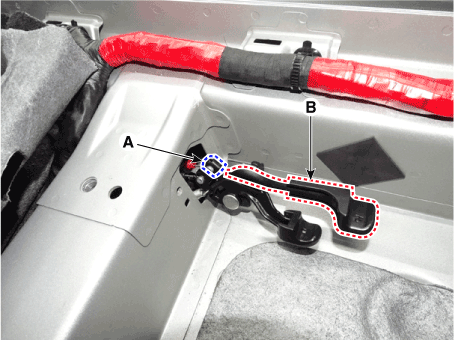
| 10. | Detach the cable (A) and remove the trunk lid catch (B).
|
| 11. | Remove the cable (B) from the trunk lid catch (A).
|
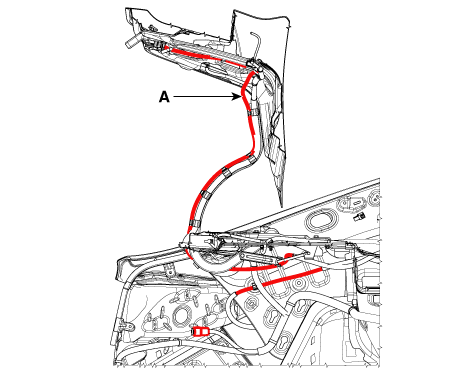
| 12. | Remove the trunk lid cable (A).
|
| 13. | To install, reverse the removal procedure.
|
| [Trunk lid catch] |
| 1. | Remove the front seat assembly [LH]. (Refer to Front Seat - "Front Seat Assembly") |
| 2. | Remove the front door scuff trim [LH]. (Refer to Interior Trim - "Front Door Scuff Trim") |
| 3. | Remove the cowl side trim [LH]. (Refer to Interior Trim - "Cowl Side Trim") |
| 4. | Remove the floor console assembly. (Refer to Floor Console - "Floor Console Assembly") |
| 5. | Separate the floor carpet to obtain space for removing the rear heating duct. |
| 6. | Loosen the trunk lid catch mounting bolt (A).
|
| 7. | Detach the cable (A) and remove the trunk lid catch (B).
|
| 8. | To install, reverse the removal procedure.
|
 Trunk Lid Trim
Components and components location
Component Location 1. Trunk lid trim
Repair procedures
Replacement
•
When removing with a flat - tip screwdriver or remover, wrap protective tape around the tools to prevent damage to components...
 Trunk Lid Back Panel
Components and components location
Component Location 1. Trunk lid back panel
Repair procedures
Replacement
•
When removing with a flat - tip screwdriver or remover, wrap protective tape around the tools to prevent damage to components...
Other information:
Hyundai Elantra (CN7) 2021-2025 Service Manual: Description and operation
Description and OperationBlcok Diagram • This system monitors the driving situations through the radar and the camera. Thus, for a situation out of the sensing range, the system may not normally operate. The System may be limited when : • The radar sensor or camera is blocked with a foreign object or debris...
Hyundai Elantra (CN7) 2021-2025 Owner's Manual: Manual climate control system
To defog inside windshield [A] : Type A, [B] : Type B 1. Select any fan speed except “0” position. 2. Select the desired temperature. 3. Select the or position. 4. Fresh mode air will be selected automatically. Additionally, the air conditioning (if equipped) will automatically operate if the mode is selected to the position...
Copyright © 2025 www.helantra7.com


.png)