Hyundai Elantra: Interior Trim / Luggage Side Trim
Hyundai Elantra (CN7) 2021-2025 Service Manual / Body (Interior and Exterior) / Interior Trim / Luggage Side Trim
Components and components location
| Component Location |
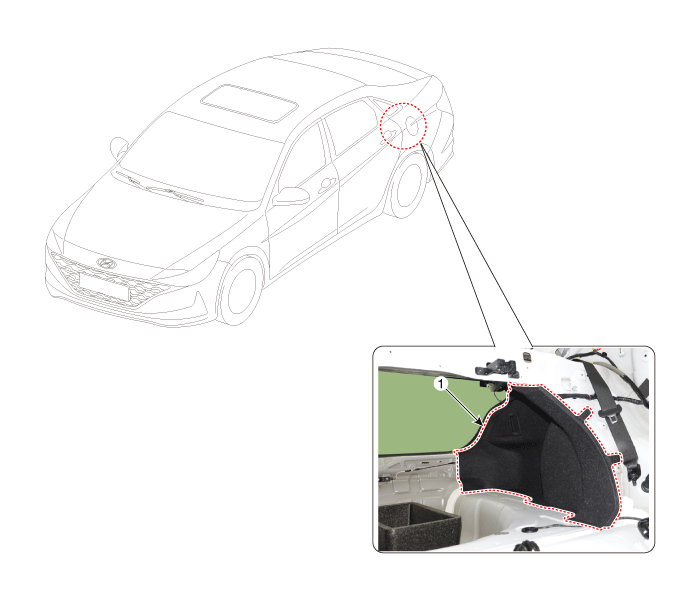
| 1. Luggage side trim |
Repair procedures
| Replacement |
|

|

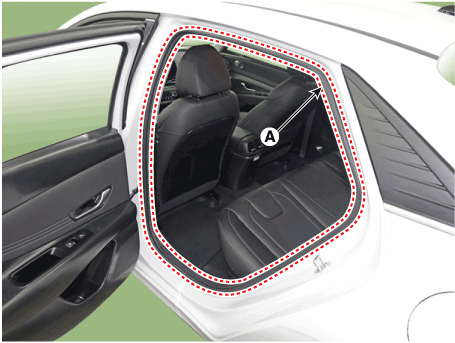
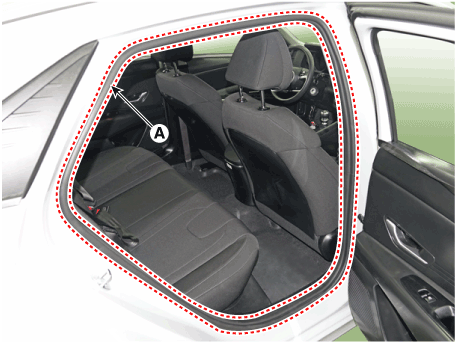
| 1. | Detach the clips, then remove the front door body side weatherstrip (A). [LH]
[RH]
|
| 2. | Remove the rear seat assembly (Refer to Rear Seat - "Rear Seat Assembly") |
| 3. | Loosen the mounting screws and remove the rear door scuff trim (A).
|
| 4. | Remove the luggage boad (A).
|
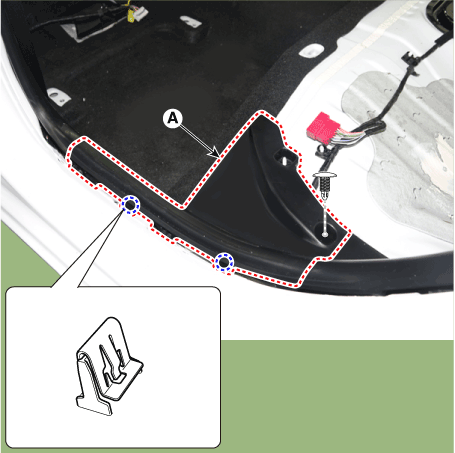
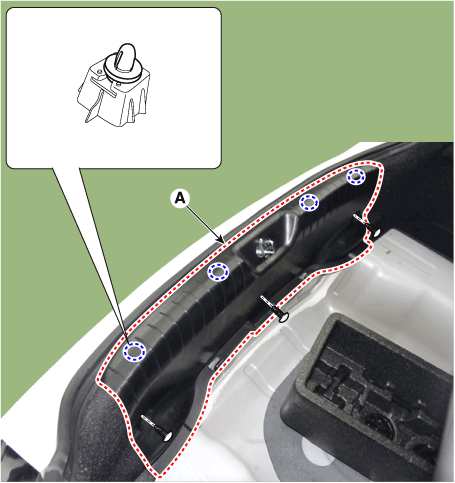
| 5. | Loosen the mounting clips and remove the rear transverse trim (A).
|
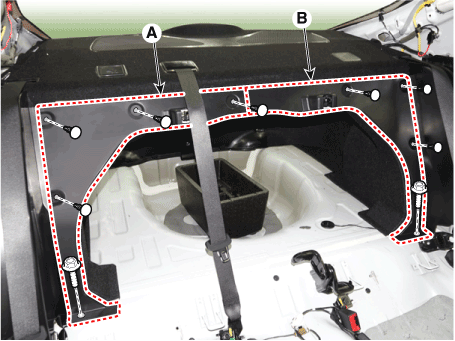
| 6. | Loosen mounting clips and bolts, remove the luggage partition side trim (A) and (B).
|
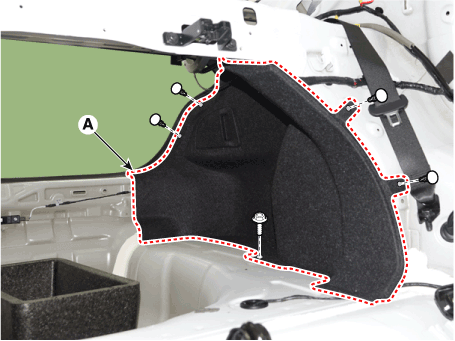
| 7. | After loosening the mounting bolts and screws, remove the luggage side trim (A).
|
| 8. | To install, reverse the removal procedure.
|
 Rear Transverse Trim
Components and components location
Component Location 1. Rear transverse trim
Repair procedures
Replacement
•
When removing with a flat - tip screwdriver or remover, wrap protective tape around the tools to prevent damage to components...

Other information:
Hyundai Elantra (CN7) 2021-2025 Service Manual: Speakers
Repair procedures Inspection1.Troubleshooting for Speaker(1)Basic inspection of speakerInspect the sound from speaker after verifying that the speaker mounting screws is removed and the wiring connector is connected precisely to remove vibration transmitted from body trims and surrounding parts.(2)Case Troubleshooting No Case ..
Hyundai Elantra (CN7) 2021-2025 Service Manual: Wireless Power Charging Unit
Components and positions Components Circuit diagram Circuit Diagram Repair procedures Removal • Handling wireless charging system parts by wet hands may cause electric shock. 1.Disconnect the negative (-) battery terminal.2.Remove the floor console upper cover assembly.(Refer to Body - "Floor Console Upper Cover")3.Disconnect the conn..
Categories
- Manuals Home
- 7th Gen Hyundai Elantra Owners Manual
- 7nd Gen Hyundai Elantra Service Manual
- Function settings
- Dimensions, Engine specification, Bulb Wattage
- Engine Mechanical System
- Forward Collision–Avoidance Assist (FCA) (sensor fusion)
- Engine Compartment
Rear center seat belt
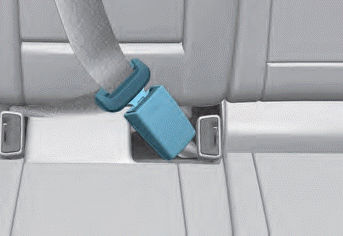
When using the rear center seat belt, the buckle with the “CENTER” mark must be used.
WARNING
Make sure that the seatback is locked in place when using the rear center seat belt.
If not, the seatback may move when there is a sudden stop or collision, which could result in serious injury.

Copyright © 2025 www.helantra7.com