
Hyundai Elantra (CN7): Crash Pad / Crash Pad Garnish
Components and components location
| Components Location |
| [This illustration shows the LHD type. RHD type is symmetrical.] |
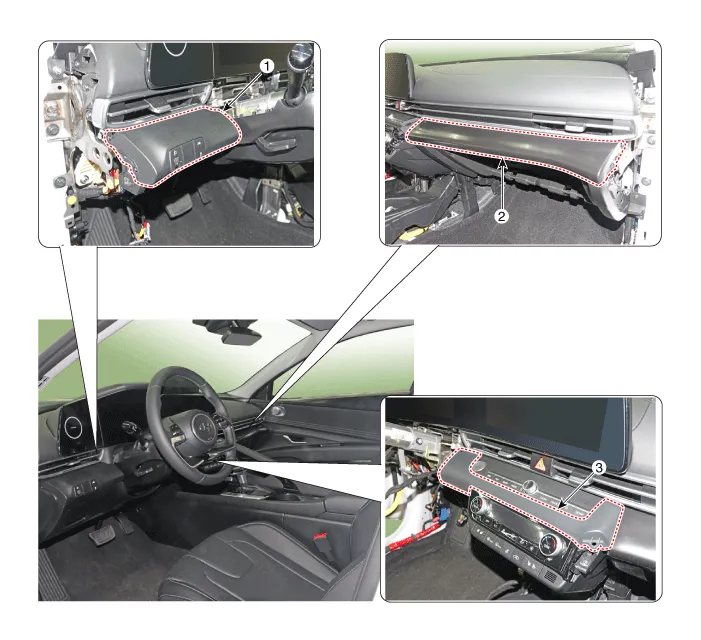
| 1. Crash pad garnish [LH] 3. Crash pad garnish [CTR] | 2. Crash pad garnish [RH] |
Repair procedures
| Replacement |
|

|

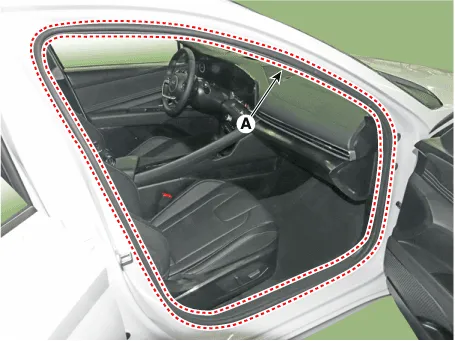
| 1. | Detach the clips, then remove the front door body side weatherstrip (A). [LH]
[RH]
|

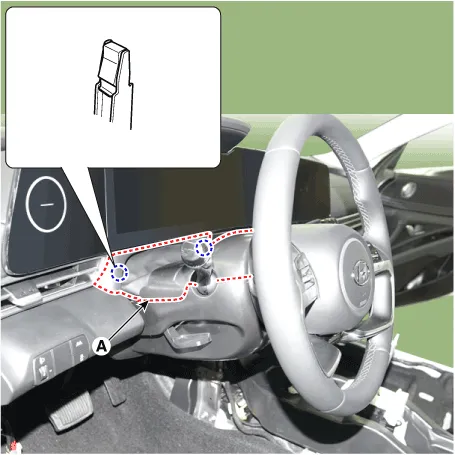
| 2. | Using a screwdriver or remover, remove the crash pad side cover (A). [LH]
[RH]
|


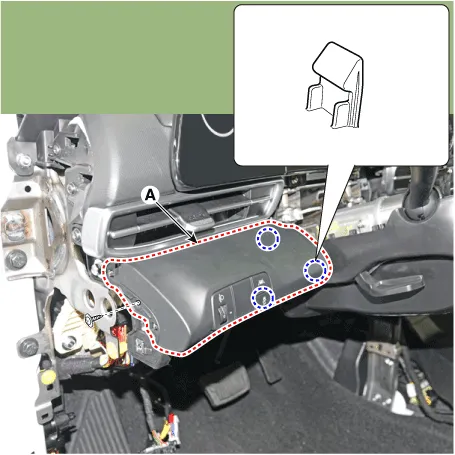
| 3. | Remove the crash pad garnish [LH]
[RH]
[CTR]
|
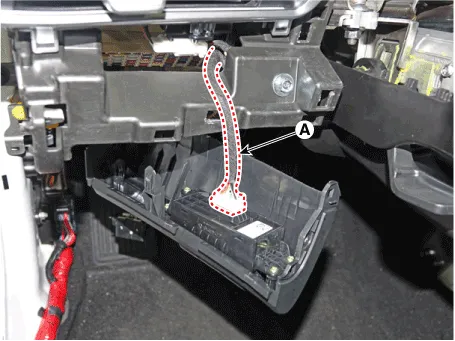
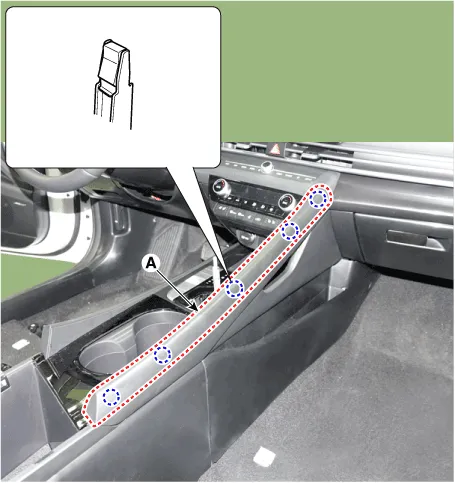
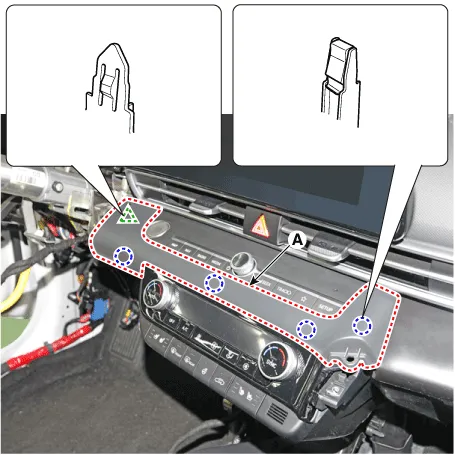
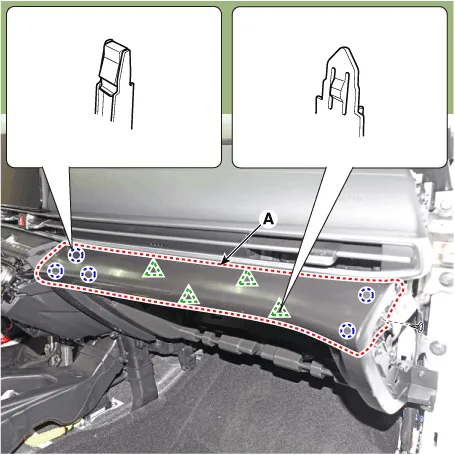
| 4. | Install in the reverse order of removal.
|

Components and components location Components Location[This illustration shows the LHD type. RHD type is symmetrical.]1. Center fascia panel Repair procedures Replacement • When removing with a flat - tip screwdriver or remover, wrap protective tape around the tools to prevent damage to components.
Components and components location Component Location [This illustration shows the LHD type. RHD type is symmetrical.]1. Crash pad lower panel Repair procedures Replacement • When removing with a flat - tip screwdriver or remover, wrap protective tape around the tools to prevent damage to components.
Other information:
Hyundai Elantra (CN7) 2021-2026 Service Manual: Troubleshooting
TroubleshootingProblem Symptoms TableBefore replacing or repairing air conditioning components, first determine if the malfunction is due to the refrigerant charge, air flow or compressor.Use the table below to help you find the cause of the problem. The numbers indicate the priority of the likely cause of the problem.
Hyundai Elantra (CN7) 2021-2026 Service Manual: Repair procedures
Inspection1.Check for resistance between terminals in each switch position (LH).[LH : Audio + Hands free] Switch Resistance (±5%) SEEK Up430 ΩSEEK Down1.11 kΩMODE2.11 kΩMUTE3.11 kΩVolume (+)4.
Categories
- Manuals Home
- Hyundai Elantra Owners Manual
- Hyundai Elantra Service Manual
- Driver assistance system
- Engine Control / Fuel System
- Body Electrical System
- New on site
- Most important about car
